Getting to accessorize with new tiles might add an interesting feature to your property’s redecoration. It’s crucial to take care of your new tiles if you want them to stay stunning for many years to come. Tiles will need thorough cleaning after they are installed and grouted.
Cleaning new tiles after installation aids in getting rid of cement, lime, and joint grout residue. After installation, this procedure is required for both glazed and unglazed tiles. Avoid cleaning tiles that are overheated, such as those that are in direct sunlight during the sweltering summer months, as this may intensify the unpleasant chemical reaction. Take advantage of the cooler times of the day to do the procedure in the summer.
Steps On Cleaning New Tiles After Installation
Grout haze is the primary concern with newly installed tiles but can be easily removed with a little magic. A white coating left on a tile’s surface following grouting is known as grout haze. It is made of minerals that are left over after grout is laid between tiles.
Here’s how cleaning new tiles after installation happens:
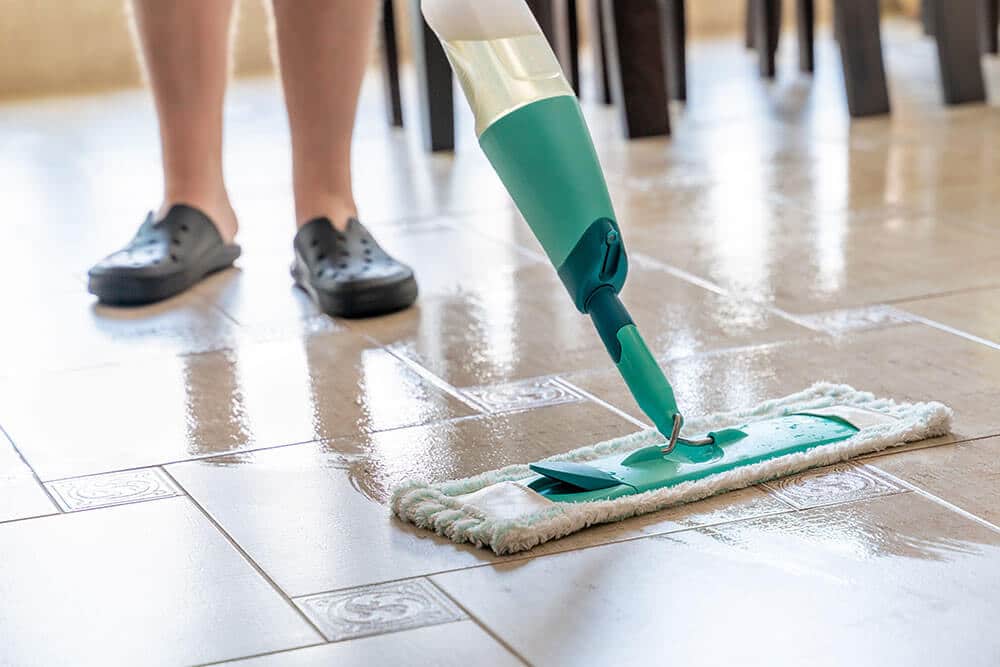
Step #1: Get The Tile Ready
After installation, the grout and dust are visible on the tile’s surface. To begin with, start by vacuuming or sweeping the tiles to get rid of any loose dirt or dust. Therefore, before the tiles are cleaned, any lumps of mortar should be removed.
Cleaning the tile surface will keep your tiles from getting scratched on them later.
You will need to buy a grout haze remover if the grout is epoxy-based. Never combine it with a grout cleaning or remover!
Make sure you are aware of the tile’s structure. While stone and wood tiles require a particular tile cleaning solution, ceramic and porcelain tiles may withstand exposure to vinegar. Ensure that the type of tile you have installed is compatible with the grout haze remover you are using.
Get a grout float made of rubber and a grout sponge. These are essential since grout haze cannot be as effectively removed with ordinary household sponges!
Step #2: Clean The Surface Of The Tile
Put on latex or nitrile gloves, particularly if you will be working with chemicals.
Using a trowel, scrape out any leftover primer or grout. When doing this procedure, take caution not to damage the coating.
Step #3: Scrub And Rinse The Tile
After cleaning, you’ll need to give the entire surface a good scrub to make sure all of the edges and tiles are spotless.
The grout haze remover should be mixed with water as directed on the bottle. Pour your haze removal solution into one bucket and freshwater into another. After dipping your nylon bristle brush into the haze remover, begin scrubbing the tiles. One at a time, focus on tiny areas.
Next, spray the tiles with the solution. Whenever possible, utilize the spray gun’s included bottles for special products. Use sponges to thoroughly moisten the surfaces if the solution is soap or another type of cleaner. Using a rag, wipe the dirt from the surface. Remove any dirt between the tiles by using a soft bristle brush, non-abrasive powder, and a gel to clean the spaces between them.
After cleaning a portion of the tile, rinse it right away and use a damp grout sponge to wash it off. Do not forget to change your rinsing water and clean the sponge regularly. Continue doing this until your floor is completely clean.
After washing away the solution residue, clean the fabric with fresh water.
Use mild or non-acidic hydrochloric powders for cleaning your tiles. The glaze’s caustics and abrasives may damage it. Make sure there is enough airflow in the area and stay away from chemical odors if you are using foaming chemicals.
Step #4: Let The Tile Air-Dry
Allow the surface to air dry. You can clean it with a dry microfiber mop. Once your tile flooring is spotless, take a step back and appreciate it.
Apply an antibiotic treatment to the joint once the area has dried to prevent the growth of mold.
Ways To Keep Tile Looking Clean For A Long Time
Tile is susceptible to recoloring and staining over time. You must pay attention to a few recommendations if you want your tile to look its best for a long time.
- Regularly vacuum or sweep your tile floors to get rid of particles and dirt.
- Apply a mild cleaner and lots of water to the floors and mop. Make sure the mop is completely dry before leaving it to prevent any residue or streaks.
- Use a moist cloth to clean tile surfaces to avoid discoloration.
- Make sure to clean your tile right away if you see any stains or accumulation.
- Instead of using an abrasive cleaner, clean tiles with nylon brushes or old toothbrushes. This may cause scratches on the tile surface, which you will not be able to remove.
These easy-to-follow recommendations can help you maintain the clean, brand-new appearance of your tile floors and surfaces for many years to come. If you want the tiles to appear in good condition for years, they should be maintained at least once a month.
Conclusion
Cleaning new tiles after installation in your property can take a lot of time, even with the finest tools and expertise. Contact the nearby flooring contractor if you feel it’s too much labor for you to handle. They can help you thoroughly clean newly installed tiles, paying attention to every little detail.
